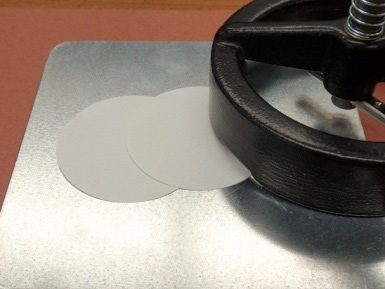
A1:More than one shell, back part, or film may have been inadvertently used.
If more than one shell, back part, or film is inadvertently inserted, jammed upper and lower dies may result.
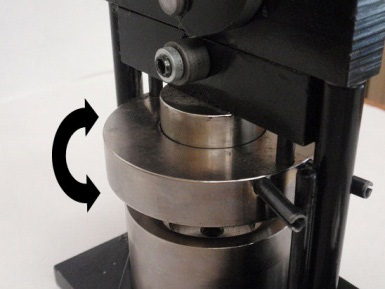
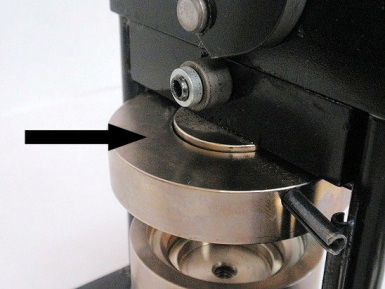
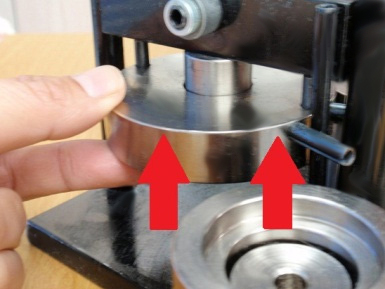
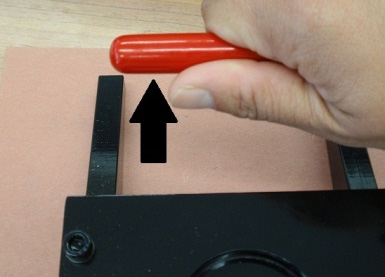
Normally the upper die moves freely up and down.
You should be able to release the stuck material by knocking the area indicated with the arrow above on both sides with a block of wood. Please do not use any hard or sharp object in or around the dies as this can damage the machine.
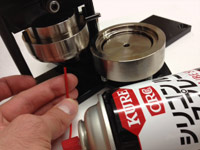
A2:If multiple shells, film, or back parts are inadvertently inserted and pressed at the same time, it's possible that some parts may be stuck in the upper die.
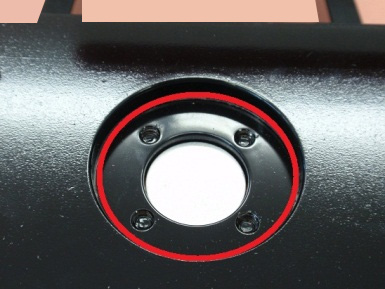
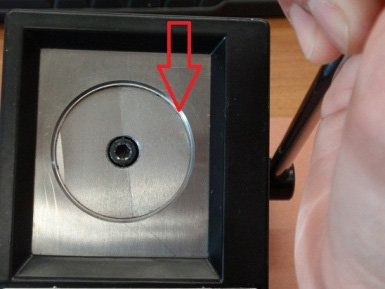
Please feel inside the upper die for a hole in the center with a bolt.
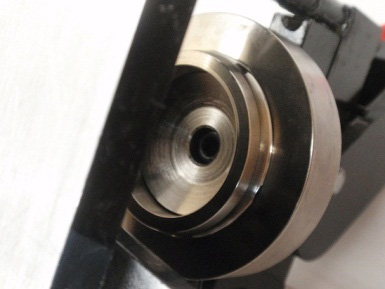
Normally, you can feel a a hole in the center of the upper die where there is a bolt.
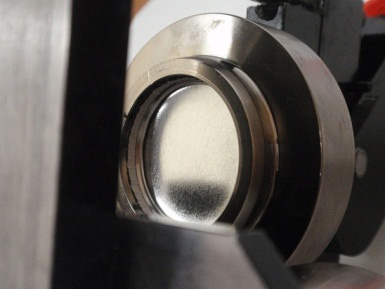
If there are parts stuck in the upper die, you would not feel this small bolt.
To remove a stuck parts, rotate the die table so that the pickup die is directly above the crimp die, then pull the handle down. The pickup die will push the stuck parts out. Please do not use any sharp tools to force shells out of the dies as this can damage the machine.
A3:Has a small piece of paper or film become lodged in the upper die?
If a small piece of paper or film becomes lodged in the upper die, the die table will not rotate completely 180 degrees.
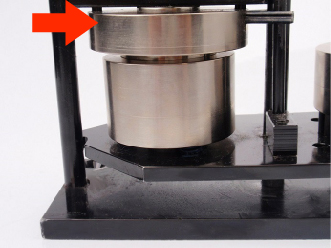
Normally, the outer portion of the upper die will move freely.
If there is a small piece of paper or film stuck between the inner and outer pieces of the upper die, the upper die will not move freely up and down. Please look inside the upper die to determine if something is stuck between the inner and outer portion of the die. You may be able to release the stuck material by knocking the area indicated with the arrow above on both sides with a block of wood. Please do not use any hard or sharp object in or around the dies as this can damage the machine.
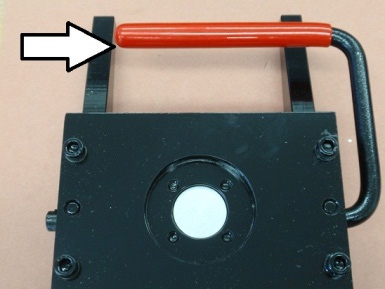
A4:Has the slender vertical bar been lodged against the roller bar?

This slender bar can get jammed if the handle is inadvertently pressed down while the die table is at a 90 degree position.
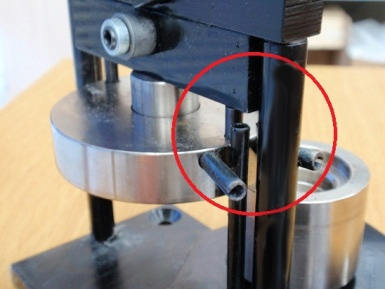
This is the normal position.
The die table will be stuck in this position.
Pull the entire upper die upward and the slender pole should release.
A5:Please check the thickness of the artwork paper.
If the paper is too thick, the film may not be able to cover the badge completely. Unless you are using photo machines, we suggest regular copy paper (0.1mm - 0.13mm).
For photo machines, 0.2mm - 0.3mm thickness is recommended.
A6:Are you using a material other than paper for your badges?
Please note that Badge-Man.Net machines are designed to be used with paper. We cannot help with problems arising from using other materials such as fabrics and transparency films. In many cases, it is possible to use other materials, however the results may be unexpected or inconsistent.
A7:Could this be caused by printer ink?
Some printers, inkjet and laser, may leave small amounts of ink or toner that are almost impossible to see but can cause small bumps on the face of the badge. Please try cleaning the head of your printer to eliminate this problem.
A8:Is there dust on your machines or parts?
Keeping your machines clean and dust-free will eliminate the possibility of getting dust, etc. under the paper or film and keep them running well. Also, be sure that the work area is tidy and dust-free so that foreign materials do not get under the artwork paper or film.
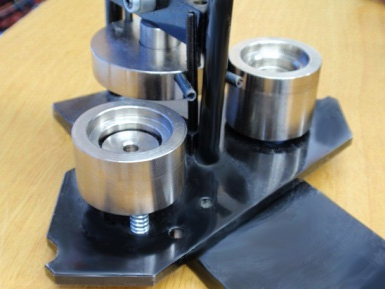
A9:Please perform maintenance.
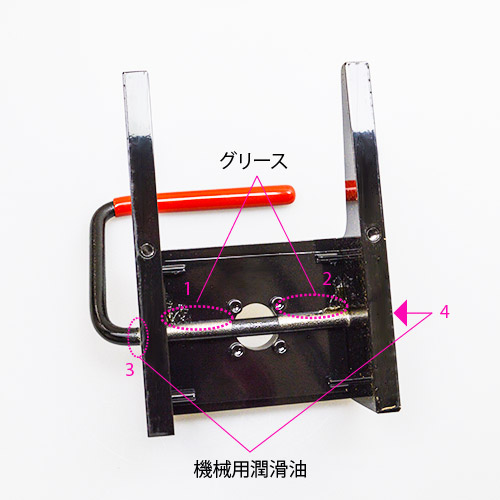
Periodically apply a small amount of lithium grease, silicon spray, and multi-purpose oil.
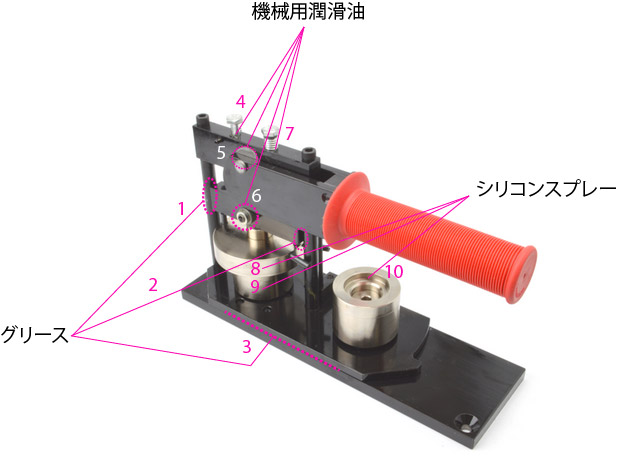
In the above image, apply lithium grease to points 1 - 3 (between the outer circular columns and the square bar, and between the die table and the base plate). Apply a drop of multi-purpose oil to points 4 - 7 (the upper bolts, the washer between the side plate of the handle, and the small roller). Apply silicon spray to points 8-10 (inside the crimp, pickup, and upper dies). Wipe off any excess with a tissue.
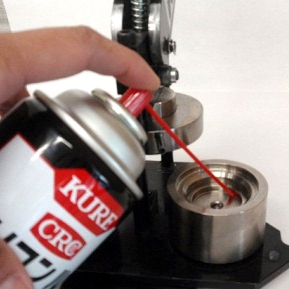
Using silicon spray sparingly and occasionally on and inside the crimp, pickup, and upper dies will prevent oxidization and allow the film to slide around the metal shell smoothly. Wipe any excess spray off with a tissue.

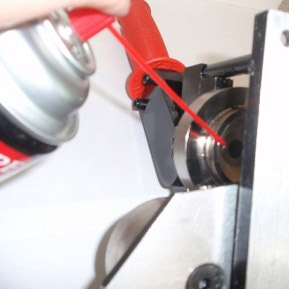
Please use silicon spray. (Silicon spray is available in the "Accessories" product category, or at your local home center). Spray silicon spray on and inside all dies (2 lower and 1 upper). Wipe off any excess with a tissue.
*When spraying silicon spray in the upper die, you don't need to turn the machine upside down, please spray from the bottom up into the upper die.

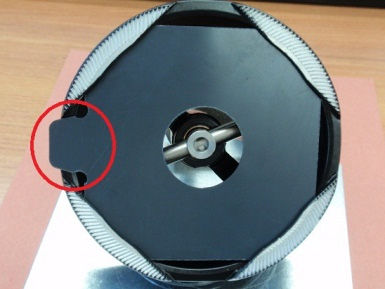
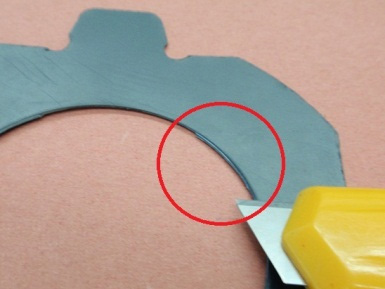
A10:Is there paper or some other material caught in the blade?
Normally, the red handle springs up and down. But if the blade is stuck, it will fall down loosely and won't spring up.
Check to see if there is anything stuck in the blade.
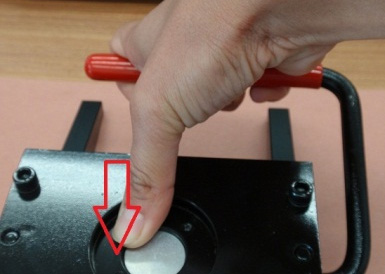
If there is some material stuck in the blade, you can probably release it by pushing the center part down while at the same time lifting the handle.
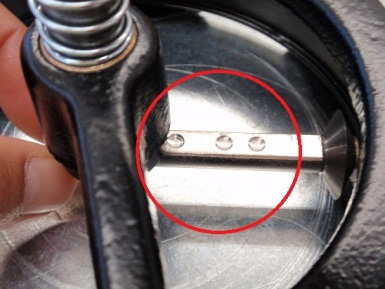
A11:Please perform maintenance.
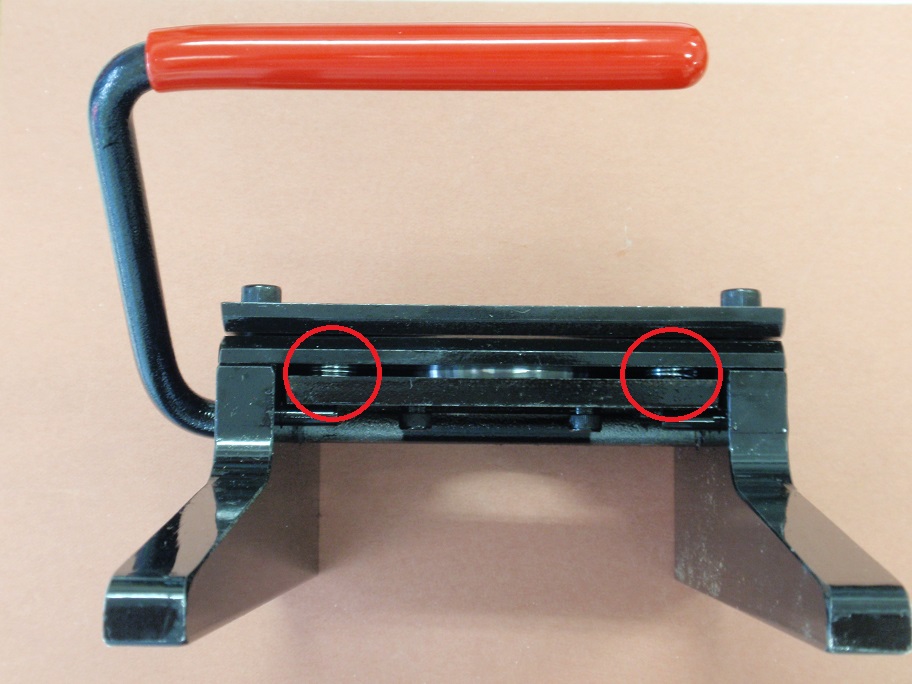
Periodically apply a small amount of lithium grease, silicon spray, and multi-purpose oil.
In the above image, apply lithium grease to points 1,2 (under the roller bar). Apply a drop of multi-purpose oil to points 3,4 (where the roller bar enters and exits the cutter). Wipe off any excess with a tissue.
Check to see if there is any foreign material stuck in the blade and that the handle springs up and down.

It's a good idea to spray silicon spray on the blades occasionally as this will prevent the metal of the blades from oxidizing. Wipe off any excess with a tissuel.
In a new machine or a machine that has been unused for a long period, the handle spring action may be stiff at first. using silicon spray, lubricate the four springs as shown in the image above (there are 2 springs on each side) and press the handle several times.
A12:I cut something other than paper...
Our cutters are designed for use with paper. Using other materials in the cutter can cause the blade to jam. (Using materials other than paper is not covered under the professional cutter warranty)
A13:Has the top portion become out of alignment?

If pressure is applied to the top portion of the cutter, it can become out of alignment and fail to cut properly. Please don't apply pressure to the top part of the cutter while cutting.
If the top is out of alignment, the blades will not line up properly.
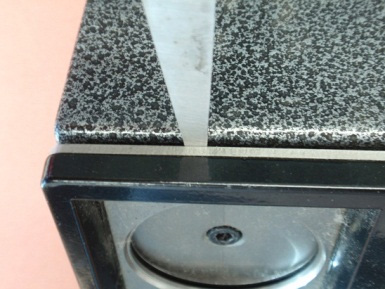
Using a screwdriver, insert it in the narrow gap along the top. You can carefully try to restore the original position of the top part.
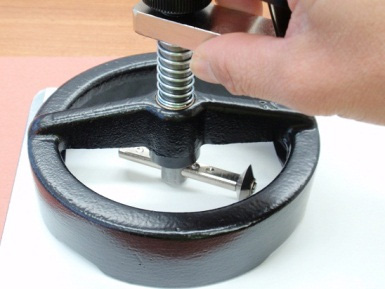
A14:Adjust the circle size.
Unscrew the center knob, and then slide the guide rod to the proper size. There are pre-set holes on this rod for 25mm, 38mm, 57mm, and 76mm size badges.
A15:Please check the plastic template and blade.
If you are changing templates, we suggest always inserting templates with the tab in the same place each time. Inserting it in different postions may cause the template to sit in a slightly different position causing the blade to not contact the paper in one place..
You can try cutting with the template removed. (Be sure to use the cutting board under the cutter)
If you can cut without the template, then the template may need to be adjusted. If you still cannot cut even when the template is removed, you may need to replace the blade.
You may need to make the template just a little larger at the place where it is not cutting.

Using a cutter knife, trim the inside of the template.